


Sustainability in the Grocery Industry: 8 Tips for Specialty Markets
Can you spot the telltale signs of a bad butcher shop layout?
Things like bottlenecks and cluttered prep stations. Customers bumping shoulders, not sure where they should go. Staff can’t find what they need — again.
This article covers how to arrange your space so your team can work faster and provide better service, making sure no sale slips away.
Let’s get started.
How To Create a Cohesive Butcher Shop Layout
Store layout can make or break your sales. In fact, research from McKinsey & Company shows that improving store flow can increase sales as much as 15% — all because shoppers can move throughout the space more easily and, as a result, spend more.
Here are six tips to set up a more efficient butcher shop layout.
1. Avoid Clutter Near the Front of House
First impressions matter, and your butcher shop layout is no different. If the front of your shop feels cramped or cluttered, it’s harder for customers to browse comfortably or even figure out where to go.
Here’s how to keep your front of house functional and inviting:
- Leave enough space between the door and the main display so customers have a moment to adjust after walking inside.
- Avoid crowding the entrance with too many impulse items or specials. A small basket of jerky or sauces is fine, but don’t block the path with bulky racks or awkward signage.
- Keep carts and signs neatly arranged. If your shop offers handheld baskets for shopping, store them in a dedicated spot up front that’s easy to see (but not obstructive).
Consider using your entry area to convey your butcher shop’s unique brand. Are you focused on old-school craftsmanship? Convenience? Specialty cuts?
Whatever the case, make sure your front of house aligns with your butcher shop’s overall vibe. The more intentional your layout feels, the more confident your customers will be in what (and where) they purchase.
2. Guide Shoppers With Smart Display Placement
If customers have to double back or squeeze through tight aisles to find what they’re looking for, they’re more likely to leave frustrated — or not buy at all.

(Image source: Lazco Refrigeration)
Well-placed display cases naturally guide traffic, but knowing which layout is best can be challenging. Here’s how you can set up displays for better shopper flow:
- Position your main display case as a focal point. Most people will look straight ahead when they walk in, so make sure your biggest case is within that sightline.
- Leave space in front and behind displays so customers have enough room to browse without blocking others.
- Use a counter or table as a service buffer, giving your team extra space to answer questions or take orders without crowding the display itself.
- Angle the case if needed. In small shops, this can help clear up traffic and let staff see who needs assistance.
Your displays are essentially acting as a working sales tool, so they need to be inviting and enticing to customers. The more clearly people can see what’s for sale and where to go, the less confusion you’ll need to manage during busy times.
Related Read: 10 Creative Meat Shop Ideas: Design and Promotion for Butchers
Don’t forget to refresh your cases throughout the day by rotating in fresh products, wiping down surfaces, and pulling anything starting to near its “best by” date. Clean, consistent presentation builds trust, especially when selling meat by weight or cut to order.
3. Position Checkout for Full Visibility
Checkout placement also affects how quickly you can move customers through the line. If the counter is hidden behind racks of meat or positioned too far from the exit, shoppers might get confused.
Here are a few tips for a well-thought-out checkout area:
- Place it near the exit so shoppers naturally finish there after browsing the display.
- Angle the counter so staff can see the front door, display case, and as much of the floor as possible.
- Add a digital scale and label printer to weigh, price, and tag custom orders on the spot.
- Use shelving or low displays to define the space without blocking visibility.
Your checkout setup ultimately depends on what kind of sales you handle most. If you sell a high volume of custom-cut orders, for example, weighing and labeling directly at the counter will save trips back and forth. For shops that prepack popular items, having a nearby cold grab-and-go unit can keep the line moving and limit crowding near the display.

(Image source: Fresh & Easy Buzz)
It also helps to use a point of sale (POS) system built specifically for butcher shops. These systems allow you to scan barcodes or custom SKUs, weigh products directly at the register, and print labels on demand — no awkward workarounds or separate software.
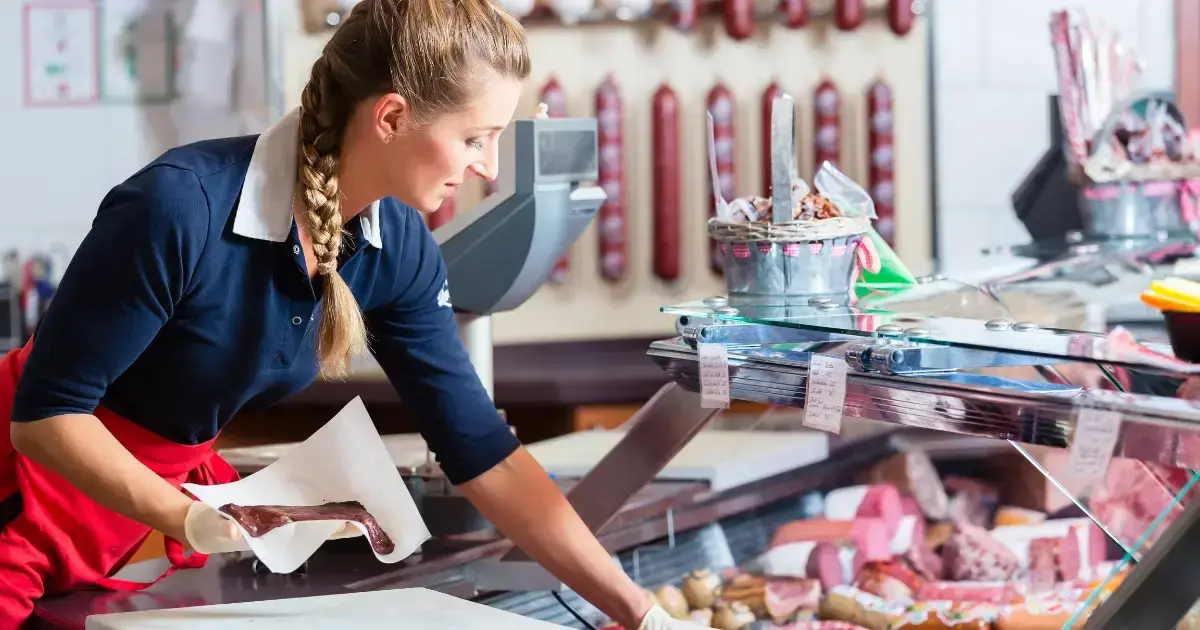
4. Define Clear Work Zones
Your back-of-house efficiency sets the tone for your entire butcher shop. When staff constantly bump elbows or can’t find supplies, it’s hard to keep the day on track, much less provide great customer service.
Set up your workspaces so each task happens in its own zone, with the right equipment nearby and enough space to accommodate all staff — even during the busiest of shifts.
Here are some workspace placement suggestions:
- Place the packaging station between the prep area and front of house to keep the handoff smooth. This avoids backtracking and lets one person wrap and weigh, while another keeps prepping.
- Put the display and sales area where customers can browse comfortably, but make sure staff can still restock from behind or the side, not through the front door.
- Tuck the cleaning station in a spot that’s accessible but away from food handling areas so staff can sanitize tools and surfaces without walking through active work zones.
For any workspaces visible to customers, cleanliness matters even more. You don’t have to keep floors spotless every second, but counters should stay clear, tools wiped, and bins tucked out of sight.

(Image source: The Grocer)
It’s also good practice to schedule quick resets throughout the day, especially in public-facing areas like the sales counter or packaging table — this way, no one gets stuck playing catch-up and cleaning the entire shop from top to bottom later.
Related Read: Starting a Butcher Shop: 6 Mistakes To Avoid
5. Keep Cold Storage Within Reach
Cold storage placement directly impacts speed, safety, and how fresh your meat looks on the shelf. And yet, many shops stick a walk-in wherever it fits — even if that means staff have to snake through the front of house just to grab a cut.
Start by determining what type of cold storage you actually need:
- Walk-in coolers hold your day-to-day inventory. This is where raw meat is stored before prep, so it should sit close to your cutting table.
- Chest freezers work well for bulk or long-term frozen items, but they slow your team down if they’re buried in a far corner or packed too deep.
- Upright reach-ins are good for overflow, grab-and-go items, or products that need frequent access, like sliced deli meats or prepacked sausage links.
- Rear-loading refrigerated display cases let your team restock from behind without disrupting customers, which keeps the front of house looking polished and well-stocked.
You generally want to keep cold storage close to the work areas and separate from customer paths. Make sure your walk-in cooler opens directly into the prep zone to cut down on extra steps, and arrange your display cases so staff can easily restock from behind without disrupting shoppers or reaching over counters.

(Image source: Commercial Refrigeration)
Here are some additional recommendations for your cold storage layout:
- Place high-turnover items closest to prep. Don’t make your staff dig for chicken thighs during a lunch rush.
- Label each cooler, freezer, or shelf by product type — whole cuts, grinds, stock bones, packaging, etc.
- Keep customer-facing units stocked from the back whenever possible to avoid interrupting service.
- Avoid stacking too high in chest freezers. The extra few seconds to unpack and repack add up fast across a full shift.
To assess the flow of your butcher shop layout, walk through your layout like you’re working a shift. How many steps does it take to reach the cooler from the cutting table? What about from freezer to display?
If you effectively cut out dead space and repetitive trips, you can save time without adding additional labor or drastically changing your workflow.
6. Make Cleaning Stations Easily Accessible
As a butcher shop owner, you know all too well that cleaning is a core part of running your business safely and efficiently. And if your team has to walk across the entire store to grab sanitizer or dump scraps, you waste time and increase the risk of cross-contamination.
Here’s how you can keep cleaning in mind when planning your butcher shop layout:
- Put sinks and sanitizers near prep and packaging areas so staff can quickly clean hands, tools, and surfaces between tasks.
- Set up a central waste bin or collection area for staff to easily access. Avoid cramming bins under counters where they’re hard to reach or easy to forget.
- Mount paper towel dispensers and spray bottles on walls to save counter space and make wiping between orders easier.
- Store backup supplies in a reachable, organized spot — not buried in the back or stuck under the register.
Customers might not see every cleaning routine, but they’ll notice when your shop looks sloppy. The best systems allow staff to stay on top of messes throughout the day, rather than letting them pile up until close.
Related Read: 6 Things Missing From Your Butchery Business Plan
Designing Your Ideal Butcher Shop Layout
A thoughtfully designed space keeps your team moving smoothly and your customers happy, so take your time planning out the placement of each station and display. Test changes one at a time, get feedback from staff, and adjust as needed until the layout works with your workflow.
If you’re hungry for more butchery tips, download our Complete Guide to Running a Butcher Shop — packed with real examples, advice, and tools to help your business run better every day.

Luke has been in the grocery industry for 15 years. Starting out as a POS technician, he worked his way up to VP. Luke has seen, adopted, and even contributed to significant technological advancements, such as moving from server-based systems to cloud solutions with Markt POS and the AI revolution transforming store operations. Luke is our resident expert for all things grocery store and point of sale technology. “Store owners spend too much time on paperwork instead of building their business. After helping my best friend's father run his grocery store, I made it my mission to give hardworking store owners better tools to succeed.”